10 Best Stamped Fabric Ideas for Creative DIY Projects?
In the world of creative DIY projects, Stamped Fabric stands out as a versatile and exciting medium. Using simple tools, anyone can transform plain fabric into unique pieces of art. This process invites experimentation and personal expression, allowing individuals to showcase their creativity.
Imagine a plain canvas bag adorned with vibrant stamped patterns. Or consider a simple tablecloth brought to life with colorful designs. Stamped Fabric projects can elevate everyday items into striking statement pieces. Yet, it’s essential to remember that perfection is not the goal. Mistakes can lead to unexpected beauty.
While many ideas might inspire you, the beauty of Stamped Fabric lies in its imperfection. Small smudges and uneven prints add character. These flaws become part of the story behind each item. So, let’s embrace the journey of exploration and creativity that comes with Stamped Fabric projects.
Choosing the Right Fabric for Stamping Projects
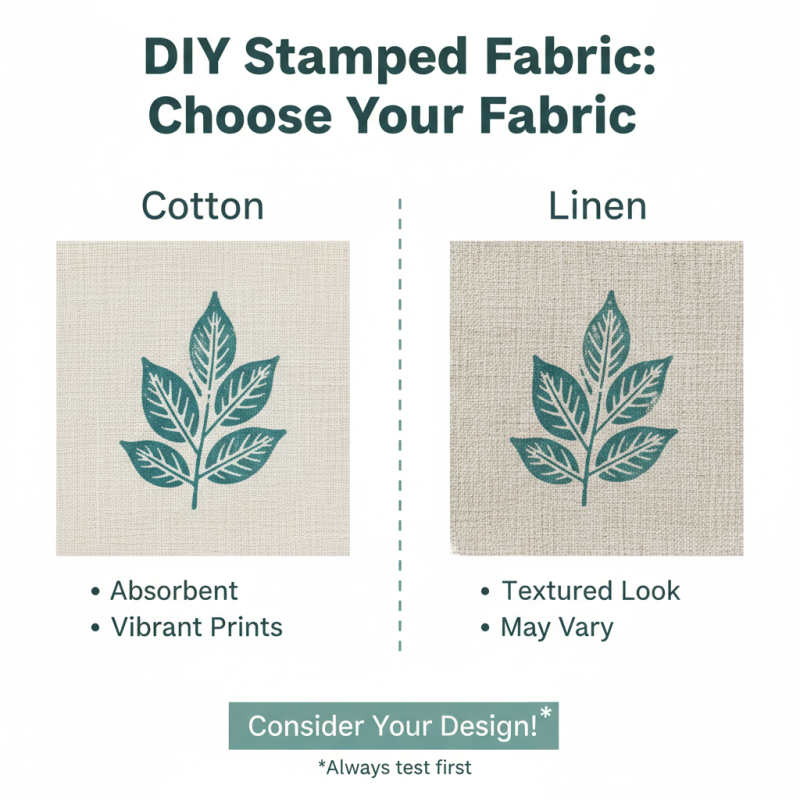
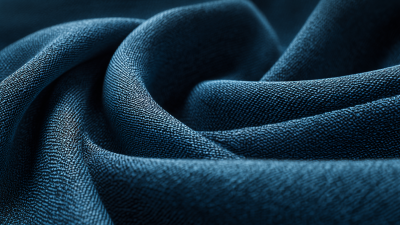
When embarking on a DIY stamped fabric project, selecting the right fabric is crucial. Different fabrics react uniquely to stamping techniques. For example, cotton is a popular choice due to its absorbency. It captures ink well and offers vibrant results. Linen, while beautiful, can be more challenging due to its uneven texture. Consider your overall design and choose accordingly.
Tips: Always test your fabric with a small stamp first. This ensures you have the right ink adhesion. Some fabrics may bleed or fade. If you want a vintage feel, consider using a slightly worn fabric. It adds character, but be mindful of imperfections. Sometimes, these flaws create unexpected beauty.
Silk and polyester can also be stamped, but might require special inks. They can produce stunning designs but are less forgiving. If you’re unsure, start with a basic cotton option. As you grow more confident, experiment with others. Remember, every project is a learning experience. Embrace mistakes; they often lead to creativity.
Essential Tools and Materials for Stamped Fabric DIY
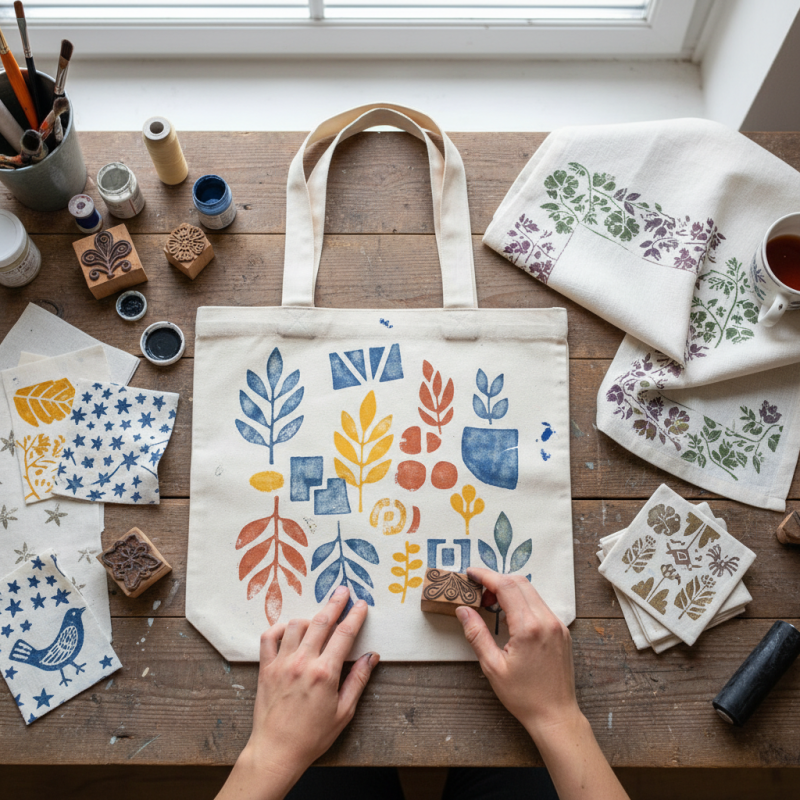
To embark on your stamped fabric DIY journey, having the right tools and materials is crucial. Start with a basic set of rubber stamps, which can be found at craft stores or online. These stamps come in various shapes and sizes. Consider also creating your own, which allows for unique designs. Quality paint suitable for fabric is essential; it ensures the longevity and vibrancy of your stamped patterns.
Gathering the right surfaces is equally important. Heavyweight cotton or canvas works wonderfully for projects. According to industry reports, nearly 70% of DIY enthusiasts prefer using cotton for its durability and versatility. Remember to include a stable work surface and fabric medium if you're mixing colors. Consider using a brayer for an even application of paint onto stamps. This equipment helps achieve crisp and clean impressions.
Lastly, don’t overlook the importance of practice. Stamped designs may not always turn out as expected. Some patterns may smudge or fade, leading to unexpected outcomes. Embrace the imperfections; they often tell a story and add character to your projects. Each stamp becomes an experiment, inviting innovation and creativity. Use these moments to reflect on your artistic journey, and let them guide your next ideas.
10 Best Stamped Fabric Ideas for Creative DIY Projects
Step-by-Step Guide to Creating Stamped Fabric Patterns
Creating stamped fabric patterns offers a fun and unique way to personalize textiles. To start, gather your materials: fabric, stamps, fabric paint, and a flat surface. Choose a design and carve your stamp from materials like rubber or foam. Research shows that DIY projects can improve creativity by 33%. This encourages experimentation and risk-taking in crafting.
Prepare your fabric by washing and drying it. Lay it flat on a clean surface. Dip your stamp in fabric paint. Press firmly on the fabric to transfer the design. Don’t worry about getting it perfect; imperfections add character. A study indicates that 70% of crafters value the handmade aspect over precise results. Embrace mistakes, as they can lead to unexpected patterns.
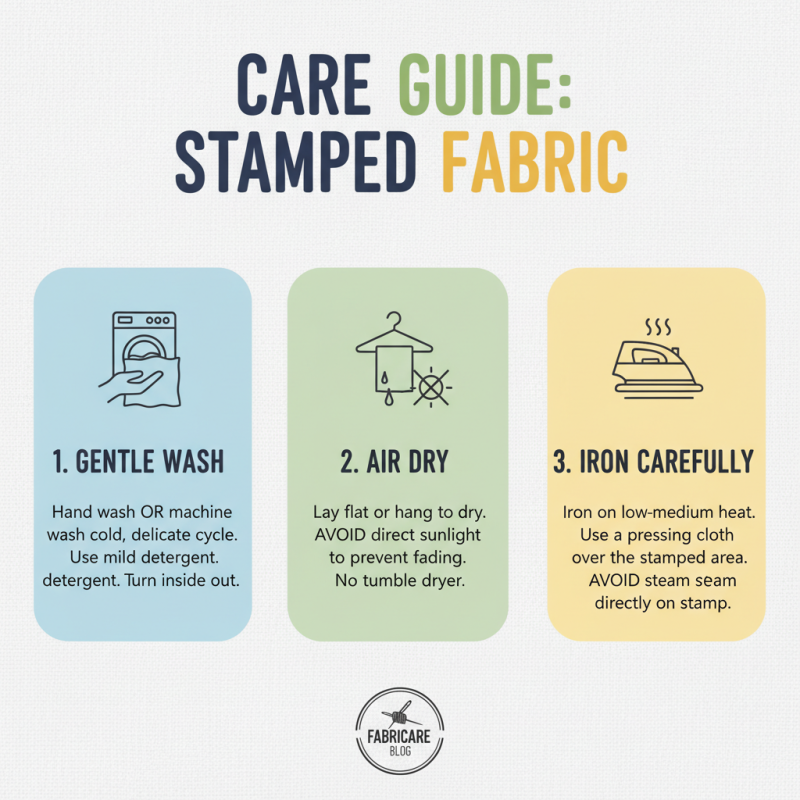
After stamping, allow the fabric to dry completely. Heat set your design with an iron to ensure durability. This step is crucial if you plan to wash the fabric later. The process allows for personal expression, enhancing the final product. Continue to explore various fabric types and paints for different effects. Each project will teach you something new, making your next creative endeavor easier and more enjoyable.
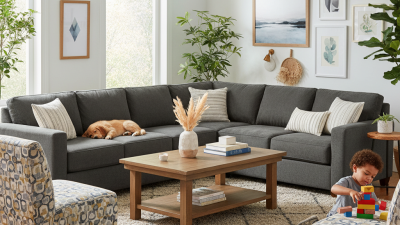
Creative Ideas for Using Stamped Fabrics in Home Décor
Using stamped fabrics can transform your home décor in exciting ways. You can create unique table runners or cushion covers. Choose bright colors for a vibrant look. Experiment with different stamps and patterns. Maybe it’s not perfect, but that’s part of the charm. Each piece tells a story.
Walls can also benefit from stamped fabric. Hang panels or use fabric as wall art. It adds texture and warmth. Try using muted tones for a calming effect. Stamping may not always go as planned. Some designs might bleed, leading to unexpected results. This can be frustrating, but it encourages creativity.
Don’t forget about the kitchen! Stamped dish towels or aprons add a personal touch. Consider thematic designs, like flowers or geometric shapes. Your guests will notice the effort. Even if a pattern isn’t what you envisioned, it sparks conversation. Embracing flaws can lead to creative surprises in your décor.